

【扮家家云渲染干貨】渲染大神Alex Hogrefe教你如何P出更真實的后期
從如何分辨場景需要什么樣的環境,如何選擇合適的,都有新的看法,所以分享給大家看看。接下來展示的要點希望可以帶來啟發,當然在實際情況中總會出現不一樣的限制,還是一句話,設計靠感覺,靈活應用才是關鍵!
(因為是翻譯,可能會有文字出入,下面有英文版本可以具體分析哦)
在大多數情況下,天空可以成就或破壞一個建筑插圖。這也是我看到很多人在渲染中忽略或只花了幾分鐘的地方。問題是,一個好的天空會為圖像設置整個基調。
正因為如此,這是我進入Photoshop后的首要任務。我花了不少時間在網上梳理圖片,以找到最適合我的場景的圖片。通過下面這些不同的圖片,你會看到從僅僅改變天空到情緒和色調的轉變。
在尋找完美的天空時,我有一些想法可以參考。應該指出的是,這些是指導方針。在架構可視化中,有許多不同的場景和情況可能不適用這些技巧。然而,我發現這種情況很少見,所以我幾乎在我創作的每一張圖片中都遵循了這些想法。
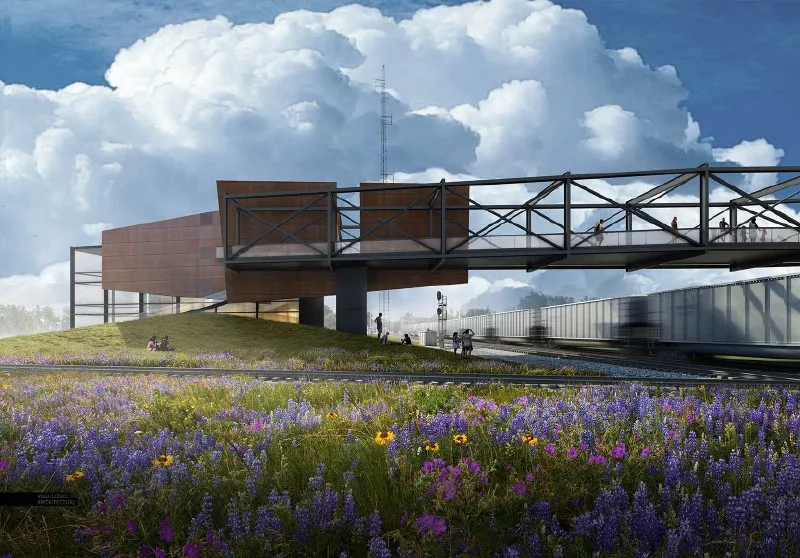
1.避免飽和度過高

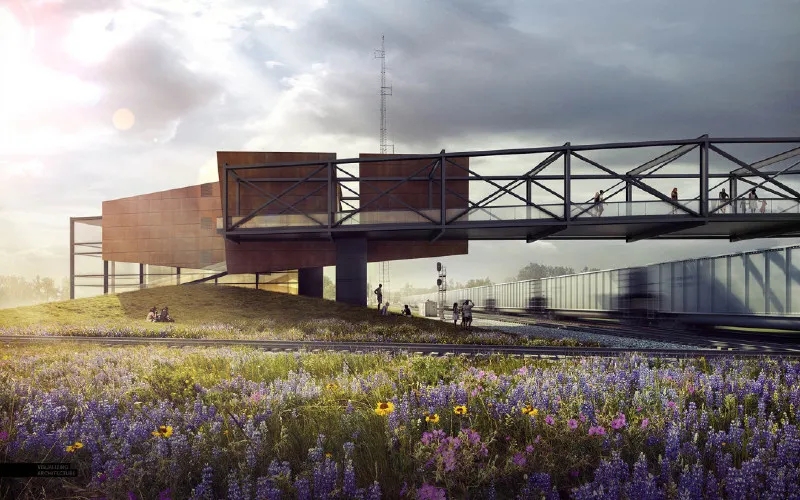
過度飽和是經常碰到的一個問題。在網上看到的許多天空圖像都有這個問題,因為天空被放大了,變得更加引人注目,吸引了觀眾的注意力。然而,過多的天空色彩飽和度會壓倒建筑和地面的色彩,破壞插圖的層次結構。為了解決這個問題,我進入“圖像>調整>色相飽和度”,我移動“飽和度”滑塊到左邊來移除一些顏色
2.避免不自然的天空顏色
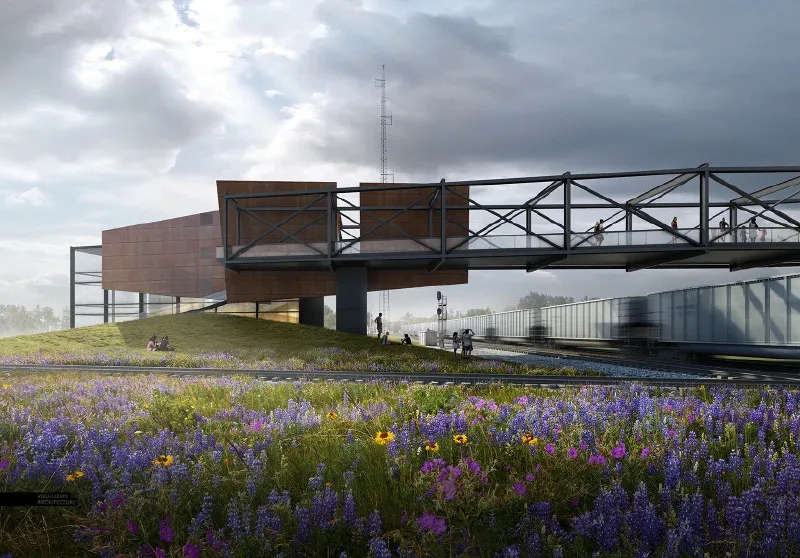
3.避免云朵占用太多
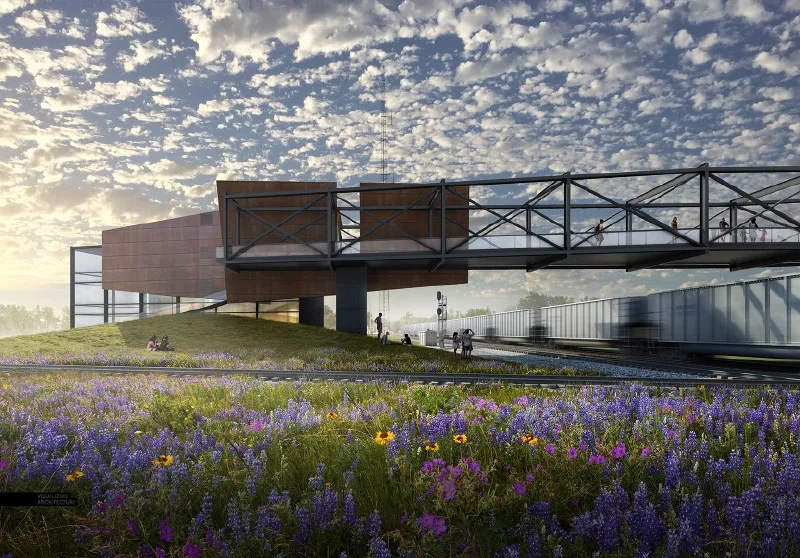
盡管你可能喜歡云,但過多的云會影響圖像。簡單地說,他們把所有的注意力從建筑上轉移了。然而,在分散注意力和引人注目之間有一條微妙的界限。我傾向于喜歡多云的天空,但是我會通過降低顏色飽和度和淡化細節來稀釋圖像,這樣紋理會更柔和。一個簡單的方法是通過尋找一個沒有云彩的天空,只有顏色,并設置它為基礎天空。然后選擇多云的天空,將這一層設置在剛剛著色的天空的頂部,并降低不透明度,使云讀起來更輕
4.光源的錯誤方向
5. 正確的透視關系
這個想法是重要還是不重要取決于觀點。然而,如果天空顯示了正確的透視,那么顯示深度的場景讀起來會更好。在上面的例子中,云幾乎沒有透視,這意味著當它們向遠處退去,接近地平線時,云的規模不會改變,這使得背景看起來更加平坦。
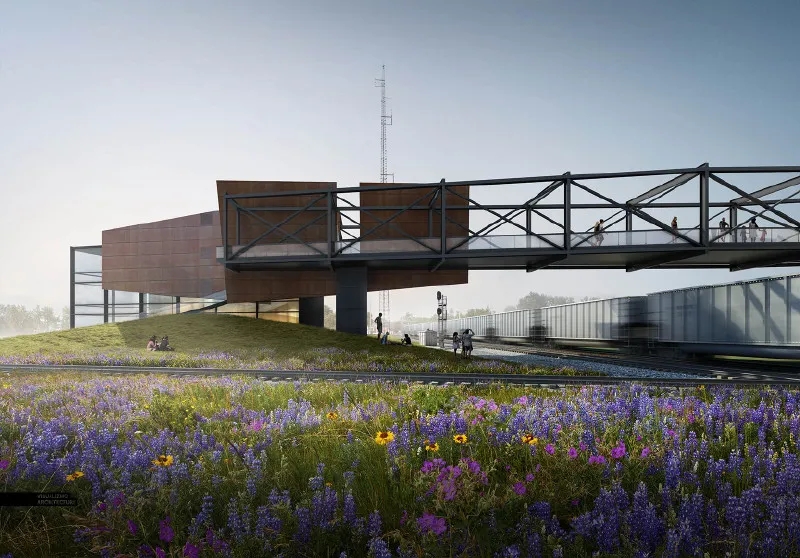
6.元素簡單點
最終效果
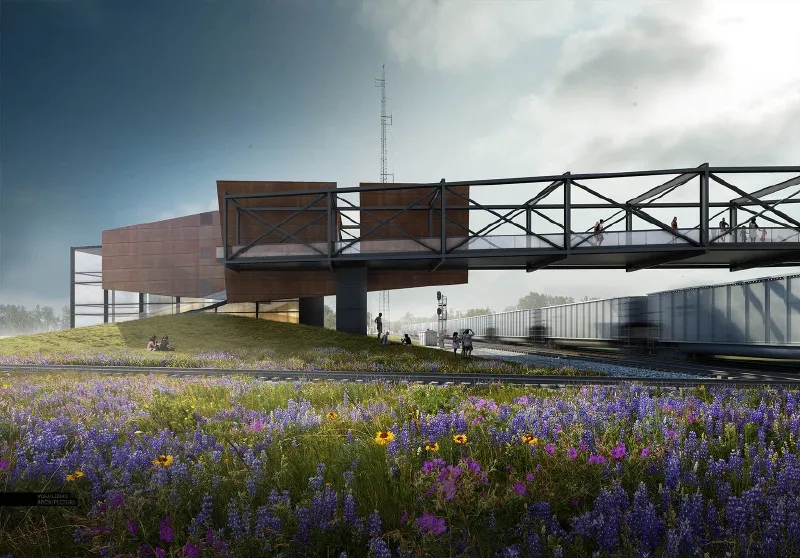
我最終選擇的天空是一個多云的有藍色口袋的天空。這使得我可以突出從左邊來的陽光,并給整個圖像一個戲劇性的由亮到暗的漸變。我使用技巧#3中描述的類似過程組合了兩個不同的云圖像。我找了一個沒有云彩,顏色很好的天空,然后把它和多云的天空結合起來。通過調整多云天空的不透明度,我能夠在顏色和柔軟度上達到良好的平衡。
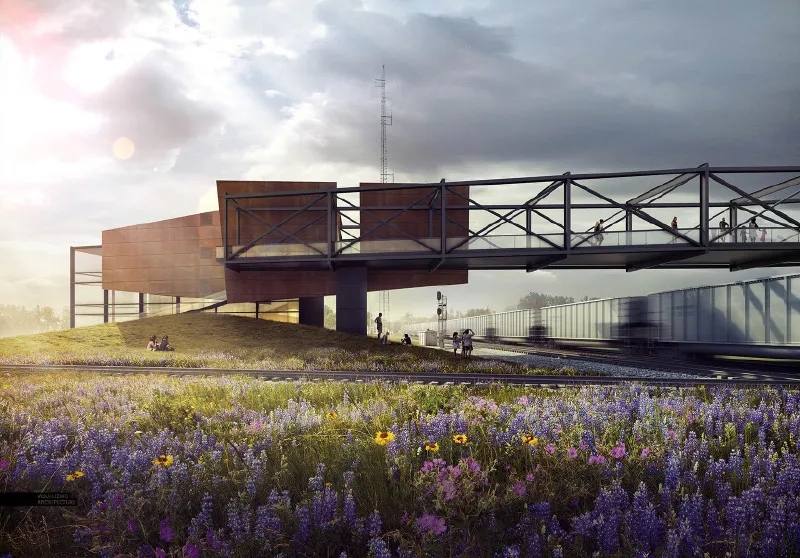
處理完天空后,我就用顏色疊加放大了暖色調和冷色調,并在圖像的基礎上增加了更多的陰影。所有這些動作都有助于將觀眾的注意力從圖像左側移開,然后慢慢移到右側,越過橋,移到右側的火車上,模仿行人走過的路線。這樣,我使用了從天空開始的光線來幫助講述這個項目的故事。
原文
I can’t believe that I have not written a post about skies yet on this blog. In most cases, a sky can make or break an architecture illustration. It’s also something that I see a lot of people overlook or only spend a few minutes on in their renderings. The thing is, a good sky sets the entire mood of an image. Because of this, it’s my first priority as soon as I get into Photoshop. I spend quite a bit of time combing through images online to find the perfect one for my scene. With the different images below, you will see how much the mood and tone shift from just changing out the sky.?
I have put together some ideas to think about when looking for that perfect sky. It should be noted that these are guidelines. There are many of different scenarios and situations in architecture visualization in which these tips may not apply. However, I have found that to be rare and I follow these ideas in almost every image that I create.?
1. Avoid Oversaturated Color
Oversaturation is an issue I see often. Many of the sky images that I find online have this problem because the sky has been enhanced or amplified to be more dramatic and catch viewers attention. However, too much color saturation in the sky will overpower the colors in the architecture and ground plane ruining the hierarchy of the illustration. To fix this, I go into “Image>Adjustments>Hue Saturation” and I move the “Saturation” slider to the left to remove some of the color.?
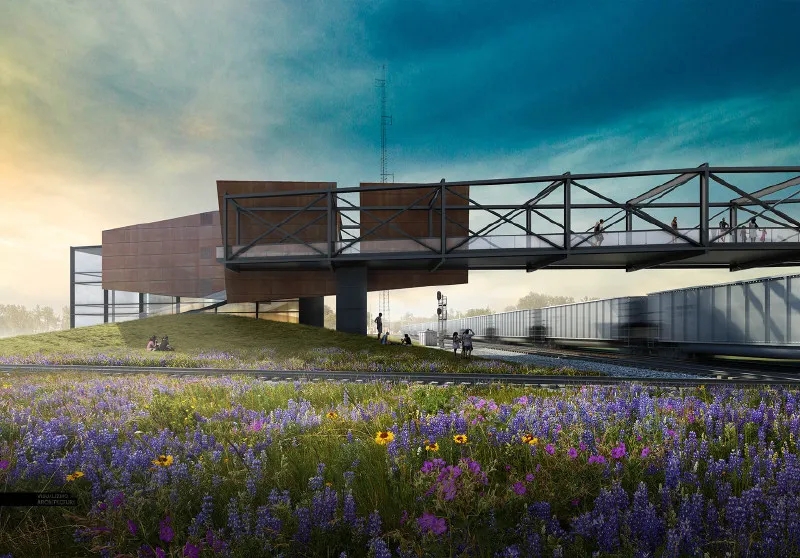
2.Avoid Awkward or Unnatural Colors
Unnatural color brings with it similar issues as oversaturation. Unnatural sky color can throw the whole image off from the start making it difficult to pull off a successful composition. Not only that, it creates a “Photoshopped” look instead of looking harmonious with the architecture and ground plane. Due to the many gradients and color tones, I prefer just finding another sky vs. trying to alter or fix the unnatural colors. However, if I really like the cloud forms or texture of the image, I sometimes will desaturate the color, and then use the color of a different sky overlaid on top.?
3.Minimize Overly Busy Skies
As much as you may like clouds, too many will hurt the reading of the image. Simply put, they take all of the attention away from the architecture. However, there is a fine line between distracting and dramatic. I tend to like cloudy skies, but I will dilute the image by desaturating the color and fading out the detail so that the texture is softer. An easy way to fade the detail is by finding a sky with no clouds, just color, ?and setting that as the base sky. Then take the cloudy sky, set that layer on top of the just-color sky, and lower the opacity so that the clouds read much lighter.
4.Wrong Sun Direction
This is one of those situations where you look at an image, and something seems off, but it is not clear what is wrong. However, once a light source issue gets corrected, the image reads dramatically better. ?This holds true for other Photoshopped elements such as entourage shadows and trees shadows. The more that the light source of all of the elements relate, then the better the entire image will read as a single cohesive illustration instead of a bunch of single Photoshopped elements.?
5.Look for the Correct Perspective
This idea is more important or less important depending on the view. However, scenes showing a lot of depth will read much better with a sky that shows the correct perspective. In the example above, the clouds have almost no perspective, meaning the clouds don’t change in scale as they recede into the distance and get closer to the horizon which causes the background reads much flatter.
Don’t Be Afraid To Go Simple
You don’t always need to show clouds. Sometimes, the perfect gradient is all that is needed to set the right tone for an image. ?This move creates a calmer scene and helps to highlight the architecture and ground plane.
The Final Image
The sky I ultimately chose was a cloudy one with pockets of blue. This allowed me to play up the sunlight coming from the left and give the overall image a dramatic light to dark gradient. I combined two different cloud images using a similar process as described in tip #3. I found a sky with no clouds and great color and then combined that with a cloudy sky. By adjusting the opacity of the cloudy sky, I was able to zero in on a good balance of color and softness.?
Once I had the sky, I amplified the warm and cool tones using color overlays and added more shadow at the base of the image. All these moves help to start the viewer’s eye on the left side of the image, and slowly move it to the right over the bridge and to the train on the right, mimicking the path pedestrians take. In this way, I am using the light started by the sky to help tell the story of the project.?
內容來源網絡,版權歸原作者所有;
本資料僅供學習研究之用,若此圖庫侵犯到您的權益,請與我們聯系刪除;


評論(0)